🔒 How to Grant User Access to Specific Files or Folders in SharePoint
When you need to limit a user’s access to only a specific folder or file in SharePoint, you can configure unique permissions on the target folder. By breaking the inherited permissions, you ensure the user won’t automatically receive permissions to other folders. Here’s a step-by-step guide.
📁 1. Locate the Target Folder
Navigate to your SharePoint site and find the folder you want to set specific permissions on.
⚙️ 2. Open the Manage Access Panel
- Click the three dots (…) or More Actions next to the folder.
- Choose Manage access from the menu.
➕ 3. Access Advanced Settings
- In the Manage access panel, click More options.
- Then click Advanced settings at the bottom. This will open the Permissions page for the folder.
🔗 4. Break Permission Inheritance
- On the Permissions page, look for the Inheritance section.
-
If you don’t see an option for Stop Inheriting Permissions, it may mean unique permissions have already been set before. In that case:
- Click Delete unique permissions first to reset.
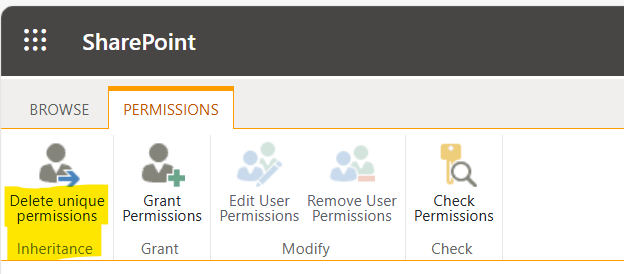
- Once available, click Stop Inheriting Permissions.
-
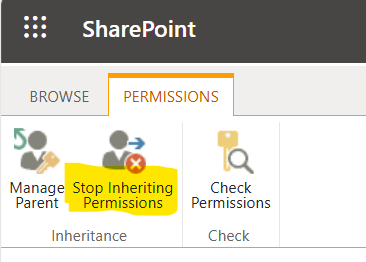
What this does: It stops the folder from inheriting permissions from the parent folder, so users with access to the parent folder won’t automatically have access to this folder or its siblings.
🙋 5. Grant Specific User Permissions
- Click Grant Permissions.
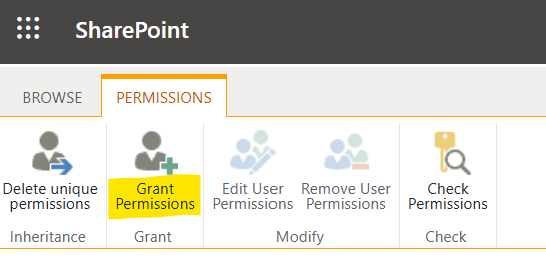
- Enter the username or group you want to give access to.
- Click Share to apply the permissions.
✅ Result
The selected user or group will now only have access to this specific folder and its contents. They will not be able to access other folders at the same level or higher in the hierarchy unless separately granted.